
Revit, Revit Families
Revit Vray Proxies (vrmesh and vrscene files). Why and When to use them?
Mar
Revit Vray Proxies (vrmesh and vrscene files). Why and When to use them?
Tired of using Revit families that have objects created in other programs that don’t have a way to assign materials to? Tired of having faceted objects that don’t look photoreal in your Revit projects? Tired of not being able to model high resolution objects in Revit? Worry no more since Vray proxies in Revit are the solution to all these issues.
Vray proxies, whether vrmeshes or vrscenes, are a specific file format only readable by Vray that offers a lot of advantages when it comes to rendering and file handling, so if you have a Vray licence or you are planning on getting one, keep reading since we will discuss the advantages of using them in your Revit projects.
Most people think that Vray proxy Revit families are mainly related to trees, plants, flowers, shrubs and any other landscaping element (Vray RPC Proxies), and while this is very true, there are many other reasons and times in which these vray proxy files can be used in Revit.
Before getting a bit more specific, let’s start by saying that any object can actually be a Vray Proxy (not only plants), but do we need all objects in our Revit projects to be Vray proxies? The answer to that is definitely no, but we will certainly use them to dress up our project and to create more photoreal renders of our projects while keeping our workflow very smooth.
In Revit, we try to use as many parametric objects as possible, whether they are walls, windows, roofs, furniture pieces, mechanical equipment or any other object, but when it comes to modeling and creating complex or very organic objects like plants or modern coffee makers that have a lot of curved parts, Revit may be a little limiting, not to mention that the parametrization becomes practically impossible. On top of that, Revit doesn’t offer too many options to map textures onto these organic objects (even if we did manage to model them), so the whole experience can become quite frustrating (to say the least). Having said this, we can definitely create some complex/organic objects in Revit, but this might throw the parametrization out the window to end up with objects that can’t be changed, except for the material or visibility.
Here is where Vray Proxies come into play. A Revit Vray proxy is also an object that once inserted into Revit, it doesn’t allow much modification, except for the scale and the materials (vrmeshes), but if we compare them to the objects that we can create in Revit, these Vray proxies offer a lot more benefits that we will now take a look at:
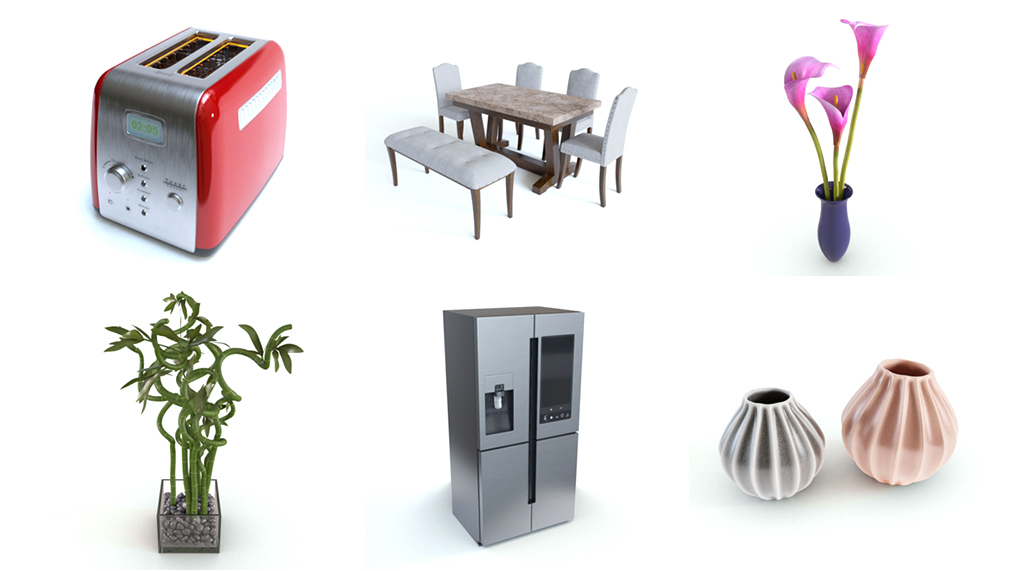
Modeling/Geometry: Vray proxy objects are usually created in other programs like 3D Max or Maya, which have amazing modeling tools that can create very intricate 3D models. All these modeling details are actually stored in the proxy, so when inserted into Revit, the object will look as detailed, smooth and nice as it looks in the other professional modeling programs. If you’ve ever downloaded families from the internet that have objects created in other programs, you might have noticed that when you insert them and when you render them in Revit, you can see all the facets (polygonal faces) of the object, which makes the object look low quality. Well, this is not an issue with Vray proxies, since they are smoothed out at rendering time to avoid seeing all these facets and to allow for a much higher quality result.


Objects modeled in 3D Max and imported into Revit. Facets make the objects look low res.
Materials and UV’s: As mentioned before, Vray proxies are usually created in other 3D programs, and these 3D programs also have amazing texturing tools that allow for precise placing of the textures according to the UV’s of the object. These UV’s are also stored in the Vray proxy, so when you use them in Revit, the original textures and UV’s are preserved and displayed correctly in your renders. This is actually a big advantage of Vray proxies, since Revit doesn’t have any options when it comes to mapping textures, especially complex mappings that require a lot of precision.

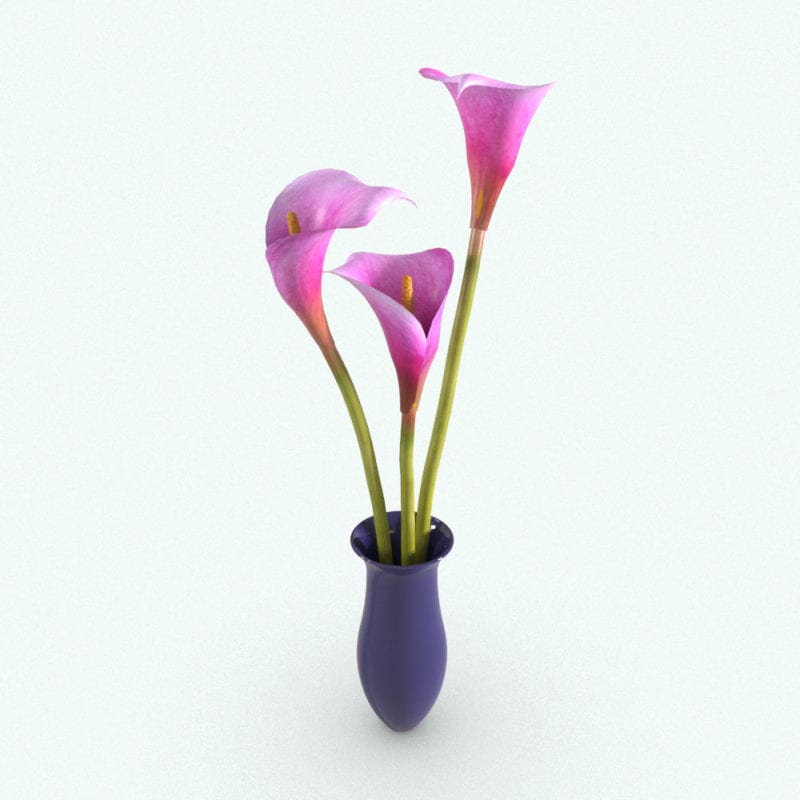
Left image: Flowers rendered in regular Revit. Only basic materials/colors can be assigned
Right image: Vray proxy version. Textures with color variations and precise mapping onto the geometry.
Small file sizes and fast workflow: While these Vray proxies store a lot of information of the 3D object their file size is relatively small and they only show up at rendering time, which means that all the time you are working with a low-res Revit family that will turn into a great looking object at render time, avoiding slow downs in your computer when you work.
Scaling: Vray proxies can be scaled regardless of the size of the family they are substituting in Revit. This is quite useful when using objects like trees, plants, shrubs or any other objects where scale is not an issue. Objects where the scale can become a big issue are objects that have standard heights, for example tables, countertops or chairs where scaling them would make them look a lot taller or shorter, so avoiding changing the scale for these objects would do the trick.
Photorealistic renders: an important advantage of Vray proxies is definitely photorealism. These objects are meant to take your renders to the next level by substituting ordinary/simple families with amazingly beautiful and high-quality 3D models. This way, a family of a cylinder and a sphere can represent a tree in the project, but when that family is rendered, they will look like a photorealistic tree that will take your render to the next level.

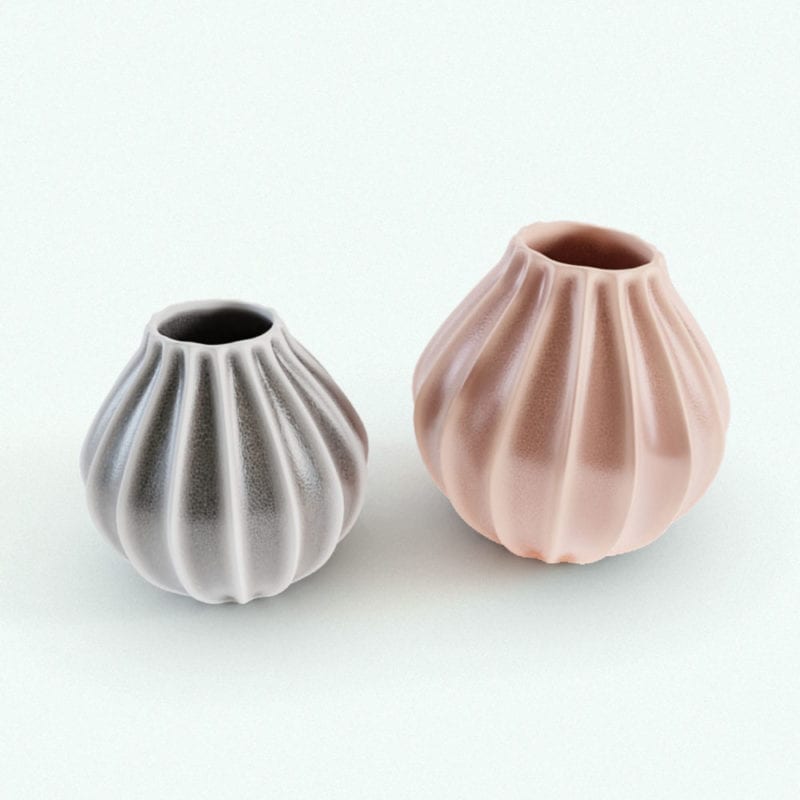
Photoreal-looking Vray proxies in Revit.
Vrscene vs vrmesh
As you can see, there are many advantages of using Vray proxies in a Revit project, but there is more to know about these proxies: Vray has two versions of proxies: .vrmesh and .vrscene files. Both of these work the same way in Revit in the sense that they substitute a Revit family at rendering time, but the main difference between them are the materials. Vrscene files are ready-to-render proxies, meaning that you don’t have to do anything to them, except to use them to substitute a Revit family, but the downside is that you can’t reassign materials to them (you can modify the original textures, or change their colors, but you can’t change material properties on them like reflectivity, transparency, bump, etc.). Vrmesh proxies on the other hand allow you to assign your own materials to each of the pieces of the object that have a different material. This way, if you don’t like the wood on the table, you can change it for glass, metal or stone. Or if you want the toaster to be shiny plastic instead of opaque plastic, you can also do that.
While vrmesh proxies offer more flexibility in terms of materials, they require that you spend a little extra time setting up your own materials, whereas vrscene proxies don’t offer material flexibility, but they don’t require any material setup since material properties are also stored in this format. In the end, both formats will give you a high-quality looking 3D model in your render, but the choice to use one over the other one is entirely up to your material needs.
Check out our selection of Vray proxies by clicking here.