
Jun
Custom Visual Styles – Graphic Display Options Revit
In another post, we talked about the six default visual styles in Revit (wireframe, hidden line, shaded, consistent colors, realistic and raytrace), which cover most of your visualization needs in the software, but Revit offers more options to display objects in the viewports. These custom visual styles options (available in the Graphic Display Options dialog box) will allow the users to create their own look, and the combination of options chosen can lead to hundreds of variations, which are great for presentation purposes mostly, although you can create some interesting styles for everyday use too.
As we discussed in the Visual Styles in Revit post, objects in Revit can display colors, textures, shading and even realistic textures, but in the Graphic Display Options section (located inside of the visual styles button at the bottom of Revit), there are more options to choose from. These options are grouped in the following sections/categories: Model Display, Shadows, Sketchy Lines, Depth Cueing, Lighting, Photographic Exposure and Background.
Available Custom Visual Styles in Revit
Before talking about each section, keep in mind that the more options you stack on, the slower your computer will become, so use these options wisely. Once again, most of these options will be used for presentation purposes as opposed to everyday work, so in these cases, it’s OK to use these more elaborate styles, especially if we need to physically print or print to PDF.
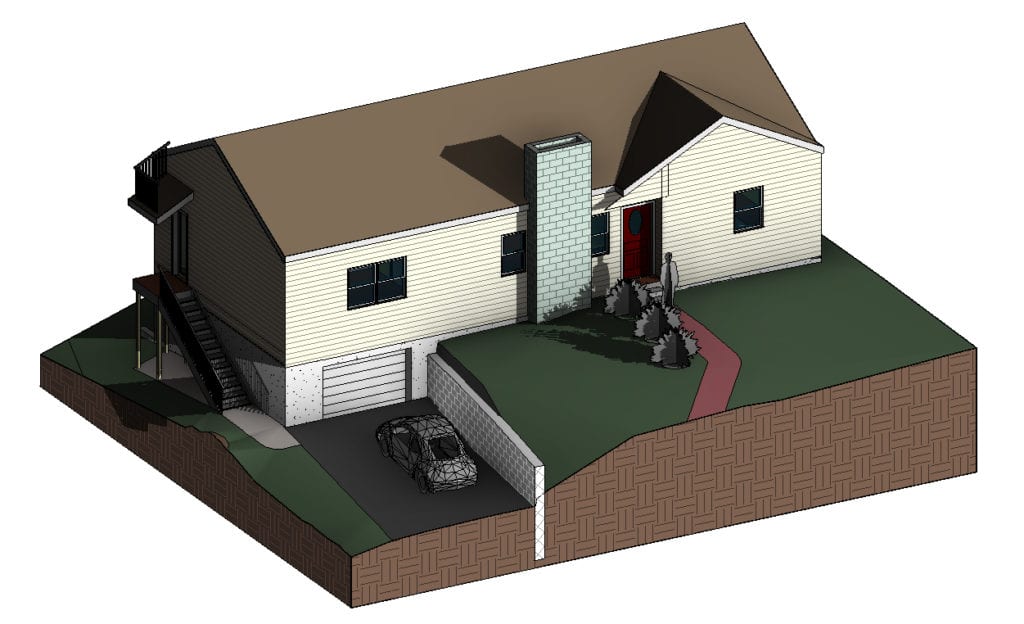
- Model Display: this section allows us to select from the available visual styles (wireframe, hidden line, shaded, consistent colors and realistic). It is basically the same as changing the visual style from the button at the bottom of Revit. This section also includes a few more options, one of which can lead to interesting results: Transparency. This transparency option will let you define how transparent the objects will be. A little bit of transparency can help us to see objects inside a lot easier, without falling into the wireframe visual style. Try different values to see the effect.
- Shadows: There are only two options in this section: Cast Shadows and Show Ambient Shadows. Cast shadows basically turns on the Shadows On/Off option (button located also at the bottom of Revit). Ambient shadows add an extra level of realism to the model. Ambient shadows are the result of indirect lighting. Even in an overcast day, we still cast shadows (very soft and diffuse ones, but shadows nonetheless), and these ambient shadows are basically that. In sunny days, there is a combination of direct shadows (the ones cast by the direct hit of the sun) and indirect shadows, which are the ones cast by the overall light in the environment or the light that bounces off from everywhere (think of that overcast example before, where the light basically comes from the sun but gets diffused by the clouds and indirectly hits objects). Ambient shadows for presentation purposes make the objects look more realistic.
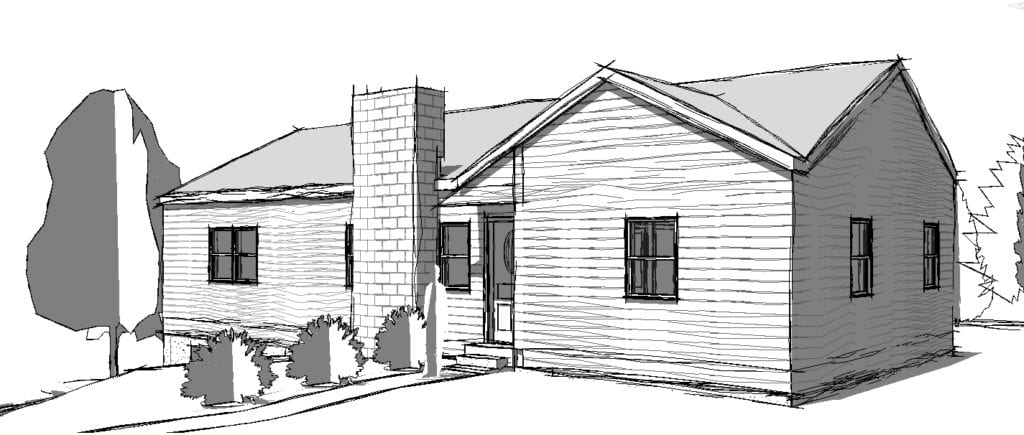
- Sketchy Lines: Since digital drafting appeared back in the 80’s, some users complained that the drawings looked too perfect. They said that such perfection made the drawings look less artistic. Don’t get me wrong, digital drafting allowed everyone to work faster and reduce the number of mistakes, which a lot of users quickly embraced, but like in everything, there will always be the ones in favor of something and the ones against it. Revit caters for everyone and this sketchy lines Revit option let’s the user add a more artistic look to the drawing by creating less straight lines that can even cross at the ends, giving it the look of a hand drawn sketch.
- Depth Cueing: This is probably one of the most interesting options in this dialog box. This option was introduced in Revit 2017 and it allows you to fade out the objects that are farther away to represent depth. This is great for elevations and sections, where it helps to identify the depth of the objects. This option had been requested a lot since we represent depth with different lineweights in elevations and sections. Before Depth Cueing, there was no way to do this other than a series of workarounds that only made the project a lot more complex and difficult to work with.
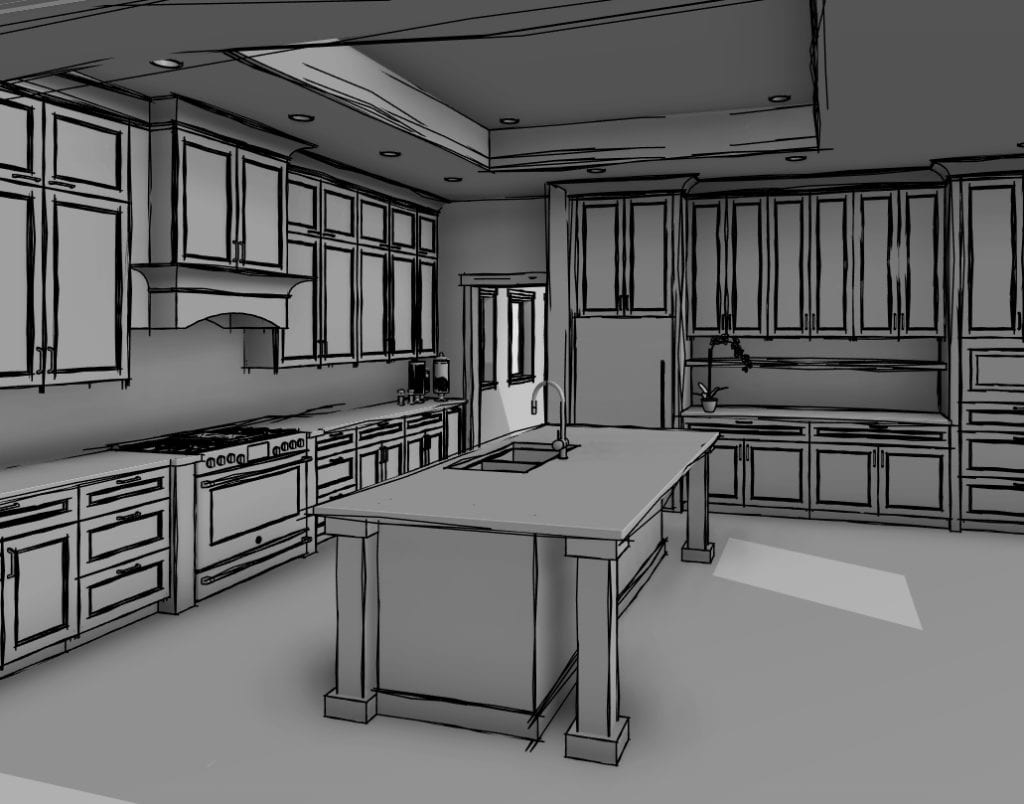
- Lighting: In this section, you can refine the lighting of your visual style, especially the intensities of the lights, the shadows and the ambient lighting. You can also change the position of the sun if you want, but this section deals mostly with the intensities of these three things. In this section you can make the shadows darker or lighter, to create a more contrasty or a brighter look for example. You can make the intensity of the sun brighter or the ambient shadows darker or lighter. Think of these options as playing with brightness and contrast in Photoshop. The result of the different combination of values for these parameters can give very different looks, which can definitely enhance your project.
- Photographic Exposure: This option is only available when the Realistic visual style is selected and it allows you to brighten or darken the viewport based on an exposure value. This exposure value is the same you find in the Rendering dialog box (Adjust Exposure…), where a lower value creates a brighter result and a higher value creates a darker result.
- Background. This last section allows you to add a background to the viewport, whether a sky, a gradient or an image. Once again, for presentation purposes, this option can be quite useful, since it integrates the project to a background, which can also be a specific image you choose (maybe the image of the terrain where the actual project will be built).
The combination of any of these options can even be saved as a View Template that you can apply to your different views (read the View Templates in Revit post for more information about them), or you can just click OK on the Graphic Display Options Revit dialog box to apply the options to your viewport immediately.
As you can see, Revit is quite powerful and full of options when it comes to displaying objects, whether it is for everyday work or for presentation purposes. All these options are worth exploring so your projects can stand out from the rest of the studios and most importantly, so your projects are legible and clear for everyone involved in the project. Keep in mind that clear/legible drawings lead to fewer mistakes, so it is definitely a good idea to spend some time exploring all these options and creating our own styles.