
Revit
Revit Cloud Rendering

Mar
Revit Cloud Rendering
Rendering a project in Revit can be quite time consuming. Depending on the options we choose, as well as the quality, a render can take anywhere between a few minutes up to many hours, and during this time, we can’t continue to work on our project since Revit is processing the render locally. Luckily for us, Autodesk offers a cloud service so we can render on the cloud while we can continue to work on the project in our computer.
First of all, what does rendering on the cloud mean? It means that we send out our file over the internet to “Autodesk’s computers” so that these computers render the project for us. This way, we don’t have to use any resources from our own computer nor we have to wait for the render to finish to continue working on the project.
The process of sending the render to the cloud is directly done within Revit through the Render in Cloud tool located in the View tab.

When you click on the Render in Cloud button, Revit will display a dialog box where you choose the options for your render. These options are simplified to: quality, exposure, view, output type and size.
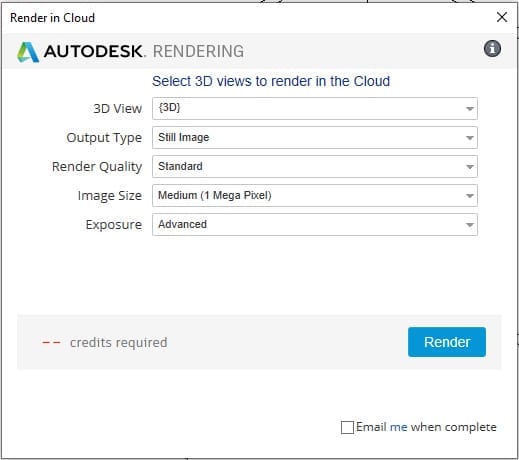
Once these options are configured and the render is sent to the cloud, we can continue to work on the project if we decide to, while the render is being processed. Once the render is finished, it will be available for us to download as an image from our Autodesk A360 account, where we can also save the renders that we have previously done.
Some of the benefits of Revit cloud rendering are:
- Renders are created faster since the computers used are very powerful and are completely dedicated to this task.
- We can continue to work on our project while the render is being processed (no downtimes)
- The quality is better. Apparently, there is a little bit of a difference in the rendering engine, and the renders from the cloud look sharper, cleaner and with nicer light bounces.
- Store renders on the cloud and have them there available for other occasions
- Manipulate the renders through simple color adjustment options directly on the cloud.
- It’s a web-based application that can be accessed anywhere and anytime.
- Notification via email (if we select that option) when the render is finished
- Panoramas, illuminance and solar studies can also be rendered.
- Free renders up to 1 megapixel at standard quality
Downsides:
- The render can take quite time to start since there might be a lot of people ahead of us rendering.
- The service has a cost and it is charged by megapixel and also by the size and quality of the image we select.
In conclusion, the benefits of using the cloud rendering service are far more than the downsides. Plus, the fact that we can continue to work on our project is certainly invaluable since renders can take a long time to process, during which we cannot move along with the project if we are not using the cloud.
Make sure to visit Autodesk’s website (www.autodesk.com) to find out more (as well as the latest updates/changes) about the cloud rendering service.
I bookmarked this page.