
Apr
Revit Design Options – Take Full Advantage of Software’s Capabilities
When working in architectural projects, whether new projects or renovations, it is quite common to come up with a few design options to present to our client. These options explore different arrangements of walls, furniture, windows, building shape or even all of these together. Presenting these options in traditional CAD systems means that we have to make several copies of the drawing and modify each copy to show exactly what the new design iteration looks like. We can do this in the same file, or we can create several files, one for each design that we want to present.
When working in 3D programs, like Revit, copying the design a few times can be expensive in terms of file size, since everything is three-dimensional and it takes more disk space. Also, creating several files (one for each design) can be a little more time consuming and in some cases confusing, since we need to juggle with more than one file.
Luckily for us, the days of copying the drawing several times or creating multiple files are a thing of the past since there is a module to explore Design Options in Revit without the need to copy the model as many times as design options we need. Design Options allow the user to explore as many variations of the original or “most likely to win design” (or the master drawing) as needed. Each variation only adds/removes a few things to the overall 3D model to make the design different, which helps to keep the file size small and to have everything within the same software/environment. For example, if we want to present three positions of the same wall or three heights of a window, we just need to move the wall or window in each variation, which means that we are not even adding any new objects since we are using the same wall/window that we had in the master drawing and just moving them around. Besides moving objects, we can also add new objects (any type of object: wall, window, door, stair, ramp, furniture, etc.) or remove objects to each variation to explore solutions other than just moving things around.
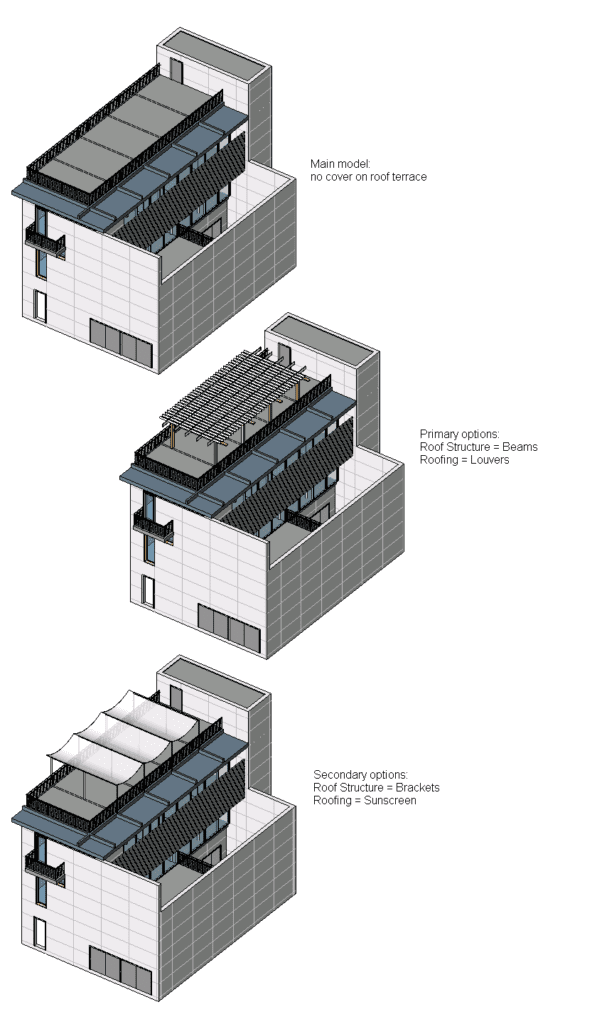
Image from: help.autodesk.com
Once our client chooses an option (or once we decide what option we want to go with), we can reject the rest of the options within the file to avoid any confusion (the rejected options will be completely removed from the file, so in case you are still not sure of the winning option, make sure you create a backup of your file with all the variations in it before you commit to one of the variations). This way, we can focus on, and continue to develop the chosen option.
The Design Options module in Revit is a very powerful way to refine our design. I highly recommend that you explore and learn how to use it in detail since it not only allows you to make better design decisions but also, to compare all the different versions at once, to keep everything under the same roof, to keep the file sizes small and most importantly to streamline your design workflow.
For more information about Design Options click on the following link: Best Practices: Design Options
I must admit that your post is really interesting. I have spent a lot of my spare time reading your content. Thank you a lot!
Yes! Finally someone writes about this.